Audio Units, version 3 (AUv3) Parameters
In my previous post on AUv3 MIDI plugins, the interval that was added to MIDI events was hard coded. In this post, the user will be able to set that interval via an AUParameterEvent.
Introduction
The old API for audio unit parameters was rather clunky and limited. Without going into it too much, here is an example of retrieving the information for the parameters supported by an AudioUnit. Note that it’s an AudioUnit and not the newer AUAudioUnit that we are using now.
1 2 3 4 5 6 7 8 9 10 11 12 13 14 15 16 17 18 19 20 21 22 23 24 25 26 27 28 29 30 31 32 33 34 35 36 37 38 39 40 41 42 43 44 45 46 47 48 49 50 51 52 53 54 55 56 57 58 59 60 61 62 63 64 65 66 | if let infos = getAudioUnitParameterInfos() { for info in infos { let paramInfo = info.1 NSLog("pid %d", info.0) if let cfn = paramInfo.cfNameString?.takeUnretainedValue() { if let p = cfn as? String { NSLog("nameString %s", p) } } NSLog("defaultValue %f", paramInfo.defaultValue) NSLog("minValue %f", paramInfo.minValue) NSLog("maxValue %f", paramInfo.maxValue) } } ... func getAudioUnitParameterInfos(unit: AudioUnit) -> [(pid: AudioUnitParameterID, info: AudioUnitParameterInfo)]? { var infos = [(AudioUnitParameterID, AudioUnitParameterInfo)]() var parameterListSize = UInt32(0) var status = AudioUnitGetPropertyInfo(unit, AudioUnitPropertyID(kAudioUnitProperty_ParameterList), AudioUnitScope(kAudioUnitScope_Global), AudioUnitElement(0), ¶meterListSize, nil) guard status == noErr else { fatalError("bad status \(status)") // getting a bad hardware error 560947818 } NSLog("parameterListSize \(parameterListSize)") let parametersCount = parameterListSize / UInt32(MemoryLayout.size) NSLog("parametersCount \(parametersCount)") var parameterIDs = [AudioUnitParameterID](repeating: AudioUnitParameterID(0), count: Int(parametersCount)) AudioUnitGetProperty(audioUnit!.component, AudioUnitPropertyID(kAudioUnitProperty_ParameterList), AudioUnitScope(kAudioUnitScope_Global), AudioUnitElement(0), ¶meterIDs, ¶meterListSize) guard status == noErr else { fatalError("bad status \(status)") } NSLog("parameterIDs \(parameterIDs)") var parameterInfo = AudioUnitParameterInfo() var parameterInfoSize = UInt32(MemoryLayout.size) for pIndex: UInt32 in 0 ..< parametersCount { let pid = parameterIDs[Int(pIndex)] status = AudioUnitGetProperty(unit, kAudioUnitProperty_ParameterInfo, kAudioUnitScope_Global, pid, ¶meterInfo, ¶meterInfoSize) guard status == noErr else { fatalError("bad status \(status)") } infos.append((pid:pid, info:parameterInfo)) } return infos } |
Yeesh.
The new API has the parameters organized into a parameter tree. There can be many more of them since they are not globally scoped as in the old API. There are many more reasons why they’re better, but let’s just start using them. Watch the WWDC audio videos for the benefits.
The Parameter tree
In the Apple template code, you’ve seen some parameter code strewn about. Let’s take a step back.
In the previous iteration, I hardcoded the interval that is added to each incoming MIDI note message. What I want to do here is to enable the user to set the interval. So that means the UI’s ViewControllers need to be able to set the interval parameter and be informed whenever it’s been changed. The Audio Unit needs to define the set of parameters that it uses. These are often the synthesis parameters such as a filter’s cut off frequency. Here we’re just concerned with MIDI.
So, the first step is to create the parameter.
I deleted the template code from the init method and created a setupParameters method instead. First I specify flags that allow the parameters to be read/write. For the convenience of the UI, I’m also creating names for an octave of intervals. I’m bad and didn’t localize them. Kids, don’t do this at home. Then, to create the parameter, invoke the parameter tree’s create method. There are several parameters that are needed. Min and max are obvious. The unit has several constants defined. Percentages are available for example. Choose the appropriate one. I set the valueStrings to my interval name array. I’ll talk about the rest in a minute. Take a look at the following code first.
1 2 3 4 5 6 7 8 9 10 11 12 13 14 15 16 17 18 19 20 21 22 23 24 25 26 27 28 | - (void) setupParameters { AudioUnitParameterOptions flags = kAudioUnitParameterFlag_IsWritable | kAudioUnitParameterFlag_IsReadable; // Create parameter objects. intervalNames = [NSArray arrayWithObjects: @"Unison", @"Minor Second", @"Major Second", @"Minor Third", @"Major Third", @"Fourth", @"Tritone", @"Fifth", @"Minor Sixth", @"Sixth", @"Minor Seventh", @"Seventh", @"Octave", nil]; intervalParam = [AUParameterTree createParameterWithIdentifier: @"intervalParameter" name: @"Interval" address:intervalParameter min: 0 max: 12 unit: kAudioUnitParameterUnit_Indexed unitName: nil flags: flags | kAudioUnitParameterFlag_ValuesHaveStrings valueStrings: intervalNames dependentParameters: nil]; // create as many parameters as you'd like here. // ... // now create the parameter tree from an array of your parameters. I just have one. _parameterTree = [AUParameterTree createTreeWithChildren:@[ intervalParam ]]; // can do this to set the initial value intervalParam.value = 4; // or this [_parameterTree parameterWithAddress:intervalParameter].value = 4; |
So now that you grok that completely, how do you get the parameter? Well in the audio unit, I defined an instance variable like this: AUParameter *intervalParam;
But what about the UI? We don’t have access to that variable. In AudioUnitViewController there is an audioUnit instance variable, which is initialized right in the VC since it is also an AUAudioUnitFactory. That’s pretty much the sum of the template UI code except for this comment:
// Get the parameter tree and add observers for any parameters that the UI needs to keep in sync with the AudioUnit
Gee thanks. How?
Well, we don’t know when the UI will be loaded if at all or when the audio unit create factory method is called. So we need to prepare for that. I created a method named connectUIToAudioUnit. Then modified the factory method to call it if the view has been loaded. For good measure, I also call this connect method from viewDidLoad. Many times I’ve had a crash if I put it in viewDidLoad alone. Don’t be like me.
1 2 3 4 5 6 7 8 9 10 11 12 | public func createAudioUnit(with componentDescription: AudioComponentDescription) throws -> AUAudioUnit { NSLog("\(#function)") audioUnit = try AUParamsAudioUnit(componentDescription: componentDescription, options: []) // Check if the UI has been loaded if self.isViewLoaded { NSLog("connecting UI in create audio unit") connectUIToAudioUnit() } return audioUnit! } |
So what does this connect method look like? Since we now have the audio unit, try to get it’s parameter tree. If you can’t, then you have to punt.
With the tree in hand (which is worth two in the bush) you can retrieve the parameter using its identifier. Or key. The API write is inconsistent. We said createParameterWithIdentifier: @”intervalParameter” – perhaps createParameterWithKey: @”intervalParameter” would have made more sense. We’re stuck with it so no use complaining. Since KVO returns the value as Any?, a cast is needed.
1 2 3 4 5 6 7 8 9 | func connectUIToAudioUnit() { guard let paramTree = audioUnit?.parameterTree else { NSLog("The audio unit has no parameters!") return } // get the parameter intervalAUParameter = paramTree.value(forKey: "intervalParameter") as? AUParameter |
Or, instead of using the parameter’s identifier/key, we can retrieve it using its address. Note that back in the create call, one parameter is named address and we pass this in. In the template code, we see a global variable in the audio unit:
const AudioUnitParameterID myParam1 = 0;
So, define it here. (Either just rename myParam1 or add a new one with a new value)
const AudioUnitParameterID intervalParameter = 0;
Add it to the header file also.
BTW, if you’re going to have a ton of parameters like most synths, you’d be better off creating these in an enum. Just sayin’.
Then we can call parameterTree.parameter(withAddress: to retrieve it and update the UI components.
1 2 3 4 5 6 7 | if let param = parameterTree.parameter(withAddress: AUParameterAddress(intervalParameter)) { DispatchQueue.main.async { [weak self] in guard let strongSelf = self else { return } strongSelf.intervalSegmentedControl.selectedSegmentIndex = Int(param.value - 1) strongSelf.intervalLabel.text = strongSelf.intervalAUParameter!.string(fromValue: nil) } } |
Wait. What’s that string(fromValue: method returning? The value strings we passed in? Not really. You have another hoop to jump through.
After you’ve created the tree, add this. This was part of the template code. Of course, it’s modified to return the interval name from my array.
What do you get if you don’t provide this? The actual value as a string. Try it. Comment it out.
1 2 3 4 5 6 7 8 9 10 11 12 13 14 15 16 17 18 | // A function to provide string representations of parameter values. _parameterTree.implementorStringFromValueCallback = ^(AUParameter *param, const AUValue *__nullable valuePtr) { AUValue value = valuePtr == nil ? param.value : *valuePtr; switch (param.address) { case intervalParameter: if (value > [intervalNames count]) { return @"default value string"; } return intervalNames[(int)value]; default: return @"?"; } }; |
Finally, in the render block, I capture the intervalParam. Remember, be selfless in the render block. Or of course, if you’re not using an instance variable, do the key lookup I showed above. Just do it in a local variable here that will be captured by the block and not in the block itself. (remember, the method internalRenderBlock is called once. The block it returns is called repeatedly at audio rate).
1 2 3 4 5 6 7 8 | - (AUInternalRenderBlock)internalRenderBlock { AUParameter *intervalParamCapture = intervalParam; //then in the block: int interval = intervalParamCapture.value; // and the rest of the previous code where it is used. |
What else? That’s it except for creating a nice UI. Don’t look at me for that; I’m still wearing a shirt from 1973. No, not from a vintage store; I bought it in 1973. Yes, I’ve washed it. I think. I’ll get back to you on that.
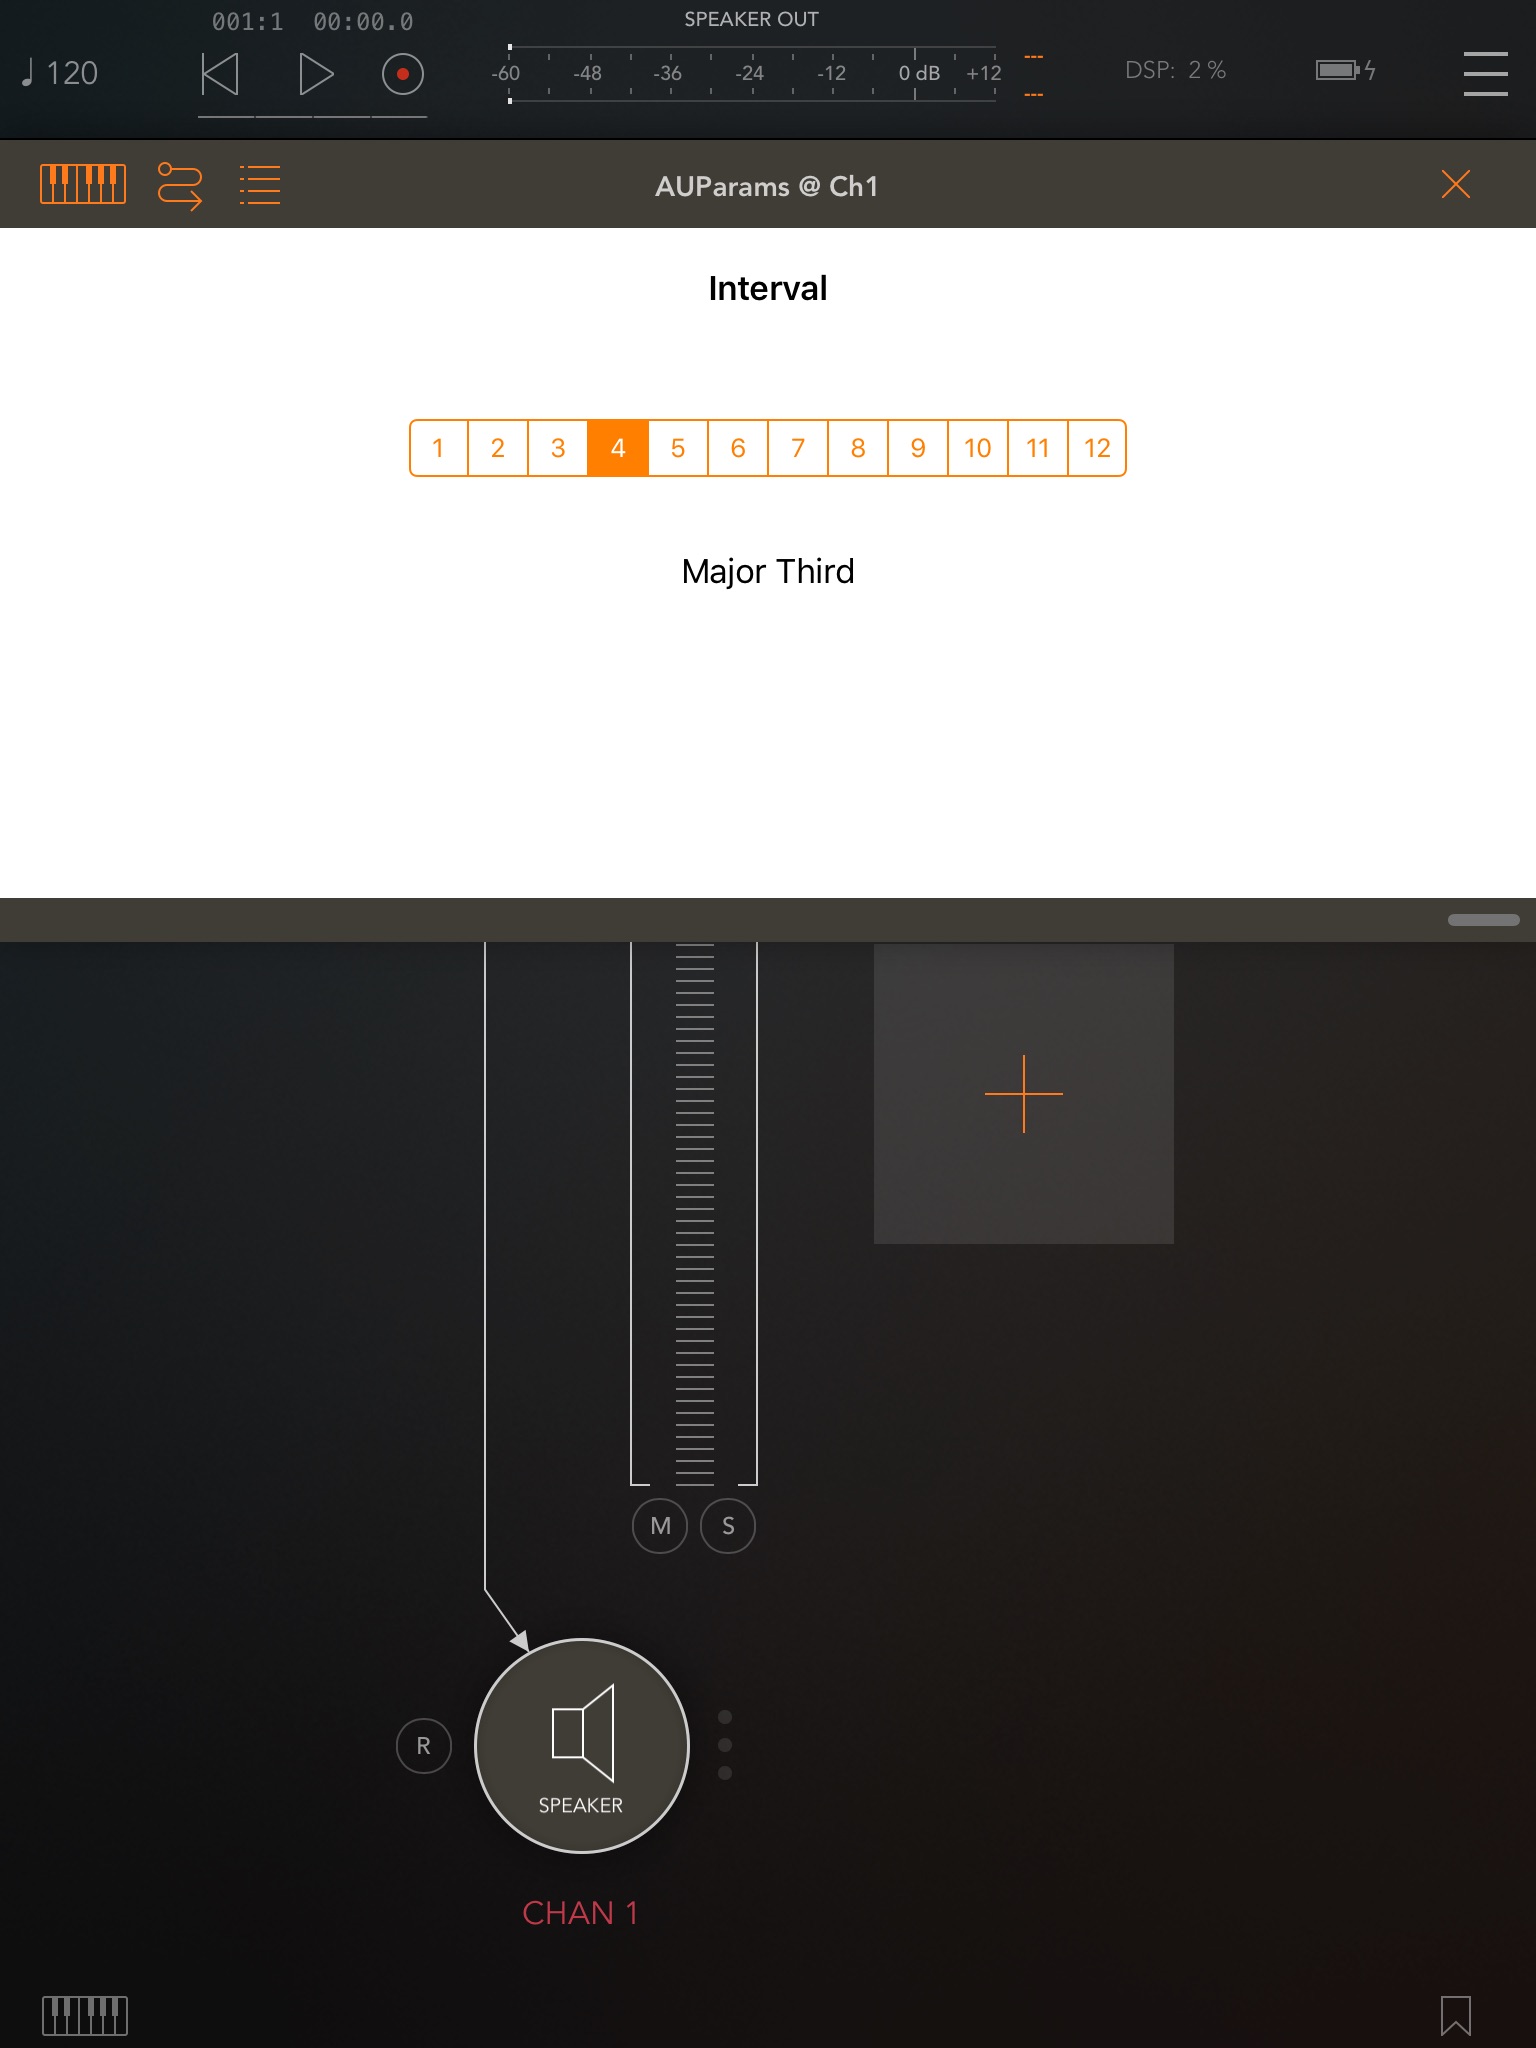
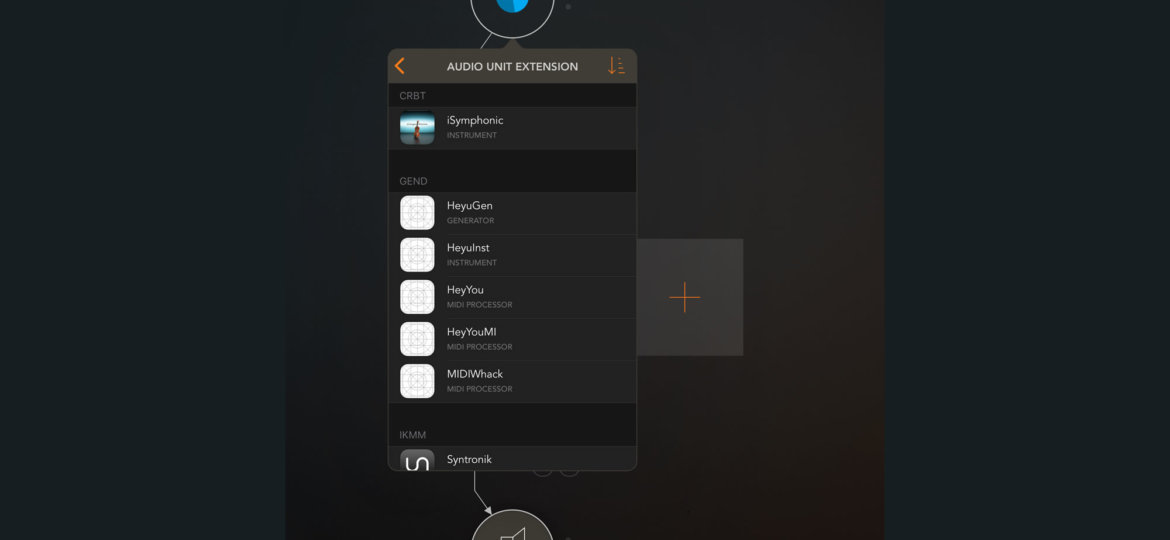
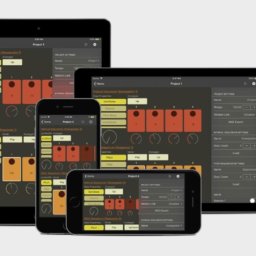
Hosted in AUM
Next post: How about timing?
Play an arpeggio or sequence?
Would you like that?
Summary
The new API for audio unit parameters is a lot less klunky than the old API. Note that I say “less klunky” and not “unklunky” or even “klunkless.

Is it still the case that you need to create the app first, then add the AU extension? Just curious as I have an idea for an app but not sure I am ready to code.
Yes, you still have to create an app extension. What you put in the actual app is up to you.
Some developers have a version of the plugin running in the apps (if they can for what it does). Others simply display a label that says it’s installed and to load the plugin in a host. The Blamsoft ones display the documentation.
This is all so ridiculously complicated, for the simplest things like updating the UI when a parameter changes, you need to search the internet for hours and spend days on trial and error because of lack of documentation, all that for maybe $200 a month for your audio unit on the App Store. Ridiculous!
I spent the time divining the proper incantations to make this work, then shared what I found out in these posts. So, yes, Apple’s documentation is inadequate. I tried to improve the situation. N.B. I do not work for Apple.
The updating of parameters involves changing the audio in the render block at the audio rate without glitches. So, it’s not complication without a valid reason.