Introduction
Editor’s note: This is multi-part AUv3 MIDI Extension tutorial By GENE DE LISA

The Rozeta Sequencer Suite by Bram Bos is a collection of AUv3 MIDI extensions that almost every iOS musician or beat dropper uses. If you’d like to write one too, you’d probably go to Apple to search for the documentation and example code. But if you’ve been writing iOS audio code for more than a zeptosecond, you know just how ridiculous an assumption that is. Apple provides you with a WWDC video where this is touched upon for maybe a minute. The development fora at Apple? Buena Suerte, gringo.
So, I’ve just whacked away and found a few vague tidbits on the net until it became a bit more clear. It’s as clear as mud now, but I have a working example. If you have any improvements, corrections, or suggestions, I’d like to hear them. Really; I barely move the needle on the ego-o-meter.
An AUv3 audio unit is an app extension. You will create a “regular” app and then add an extension to it that will be the audio unit. The end user will run the regular app, which will install the audio unit(s). They will then use an AUv3 host to run your audio unit. I’ve tried AUM, BeatMaker 3, and Cubasis 2 during testing. This is the same procedure for the usual “audio” audio units.
When you create the extension, it will ask you what language to use. If you specify Swift, the generated UI code will be in Swift. The Audio Unit code, however, will be Objective-C. If you do not want to code in Objective-C, you can’t write an audio unit right now. You’ve probably noticed the problems before if you’ve ever written a render callback in Core Audio using Swift. Maybe it will be possible after Swift 5 when the ABI is nailed down. Maybe.
How to
Create a regular iOS app. This is what will be published to the app store. This is not the audio unit. You need it to create an extension.
Add a new target to the project. Choose the Audio Unit Extension. (Surprise!)
Here are the options.
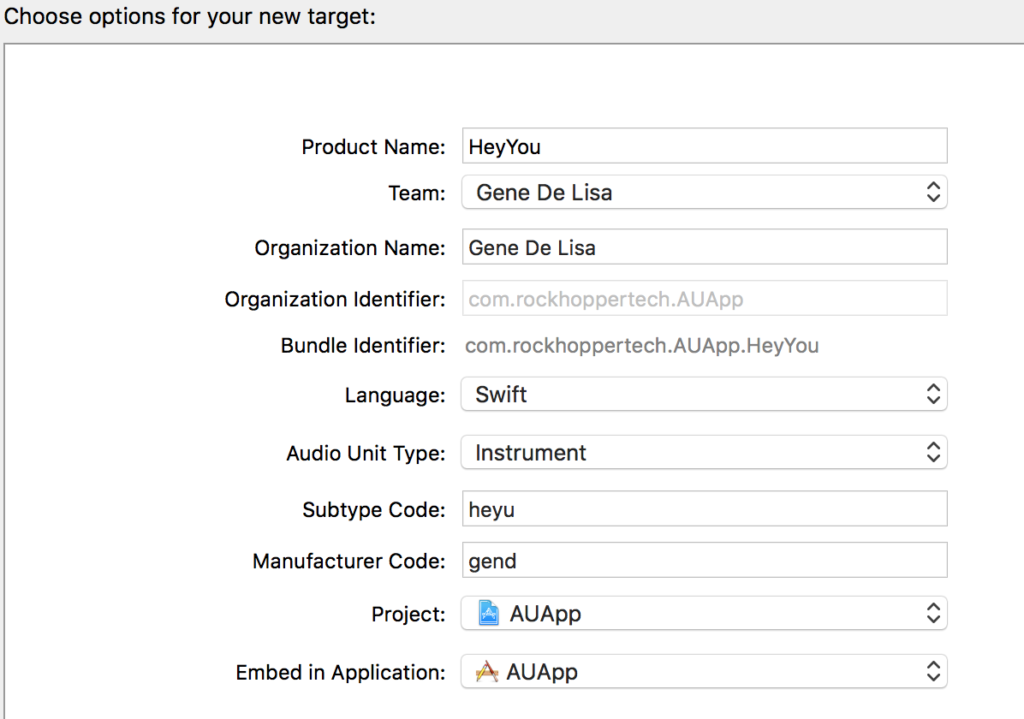
Makeup manufacturer and subtype codes. Exactly 4 ASCII characters.
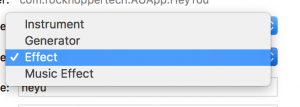
For the audio unit type, choose anything. (Where’s the any key? – Homer). There is an option for a Music effect (aumf), but want another type (MIDI Processor: aumi) not presented. We’ll have to change it later.
If you look at the XCode template, these are the current types for this option. (Maybe they will update these in a later release).
1 2 3 4 5 6 7 8 9 10 11 12 13 14 15 16 17 18 19 20 21 22 23 24 25 26 27 28 29 30 31 | Instrument audioUnitTypeCode aumu audioUnitTypeTags <![CDATA[<string>Synthesizer</string> ]]> Generator audioUnitTypeCode augn audioUnitTypeTags Effect audioUnitTypeCode aufx audioUnitTypeTags <![CDATA[<string>Effects</string> ]]> Music Effect audioUnitTypeCode aumf audioUnitTypeTags <![CDATA[<string>Effects</string> <string>MIDI</string> ]]> |
Doesn’t matter here:
When prompted to activate the scheme, say yes.
Since you asked for Swift, the user interface is Swift. The audio unit is Objective-C.
The first thing to change is the audio unit type. You do that in the info.plist for the extension – not the app’s info.plist.
We want the type to be “aumi” which is a MIDI processor; an extension that is just MIDI and no audio.
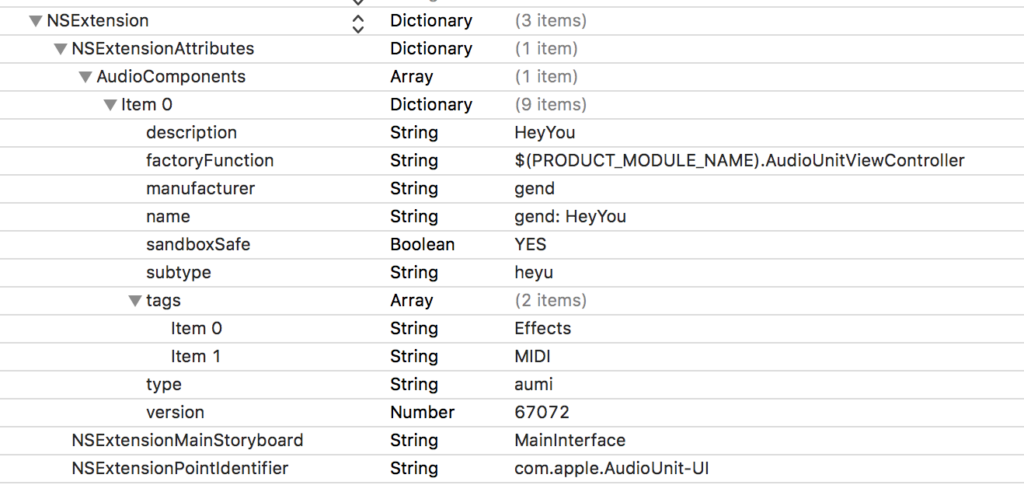
set the type to aumi
Catching the busses
Groovy. Now open up HeyYouAudioUnit.m (or whatever you named your audio unit;
mine is heyyou (heyyou/au. get it?)).
1 2 3 4 | - (AUAudioUnitBusArray *)inputBusses { #warning implementation must return non-nil AUAudioUnitBusArray return nil; } |
You will see a few warnings. You need to return two AUAudioUnitBusArrays – one for input and one for output. You will not be writing audio to these busses, but you need to provide them anyway.
I added five instance variables, asbd to cache an AudioStreamBasicDescription, _inputBus, _inputBusArray, _outputBus and _outputBusArray. In the initWithComponentDescription method, I allocate them. I’m not using the asbd later, but if I were playing a sequence, I’d want it.
1 2 3 4 5 6 7 8 9 10 11 12 13 14 15 16 | AVAudioFormat *defaultFormat = [[AVAudioFormat alloc] initStandardFormatWithSampleRate:44100.0 channels:2]; asbd = *defaultFormat.streamDescription; // create the busses with this asbd. _inputBus = [[AUAudioUnitBus alloc] initWithFormat:defaultFormat error:nil]; _outputBus = [[AUAudioUnitBus alloc] initWithFormat:defaultFormat error:nil]; // Create the input and output bus arrays. _inputBusArray = [[AUAudioUnitBusArray alloc] initWithAudioUnit:self busType:AUAudioUnitBusTypeInput busses: @[_inputBus]]; _outputBusArray = [[AUAudioUnitBusArray alloc] initWithAudioUnit:self busType:AUAudioUnitBusTypeOutput busses: @[_outputBus]]; |
So now in the accessor methods, I do this.
1 2 3 4 5 6 | - (AUAudioUnitBusArray *)inputBusses { return _inputBusArray; } - (AUAudioUnitBusArray *)outputBusses { return _outputBusArray; } |
Caching important blocks from the host
Now, add 3 more instance variables. You will not set these in the initWithComponentDescriptionmethod.
1 2 3 | AUHostMusicalContextBlock _musicalContext; AUMIDIOutputEventBlock _outputEventBlock; AUHostTransportStateBlock _transportStateBlock; |
Now, in the allocateRenderResourcesAndReturnError method, you will be handed these objects by the AU host. Or not. If the host forgot to implement this, set them to nil. And then use a good host.
In deallocateRenderResources, set them to nil.
1 2 3 4 5 6 7 8 9 10 11 12 13 14 15 16 17 18 19 20 21 22 | - (BOOL)allocateRenderResourcesAndReturnError:(NSError **)outError { the super call etc... if (self.musicalContextBlock) { _musicalContext = self.musicalContextBlock; } else { _musicalContext = nil; } if (self.MIDIOutputEventBlock) { _outputEventBlock = self.MIDIOutputEventBlock; } else { _outputEventBlock = nil; } if (self.musicalContextBlock) { _transportStateBlock = self.transportStateBlock; } else { _transportStateBlock = nil; } |
Now create an array of MIDI output names. I’m just writing to one port, so I’m returning one value in the array.
1 2 3 | - (NSArray*) MIDIOutputNames { return @[@"HeyYouMidiOut"]; } |
The Render Block
Now we get to the action – AUInternalRenderBlock! The method is stubbed out for you. Inside the returned block, we can play around with the MIDI events which are passed in via realtimeEventListHead parameter. This method is called for other purposes, so you need to check the head to see if this time it’s MIDI data.
1 2 3 4 5 6 7 8 9 10 11 12 13 14 15 | AURenderEvent const* event = realtimeEventListHead; while (event != NULL) { switch (event->head.eventType) { case AURenderEventParameter: break; case AURenderEventParameterRamp: break; case AURenderEventMIDI: // frobnosticate the MIDI data here break; case AURenderEventMIDISysEx: break; } |
Now since it’s a “list” of events, iterate through them. The AUMIDIEvent is contained in the render event. It’s convenient to break out the individual data here.
1 2 3 4 5 6 7 8 9 10 11 12 13 14 15 | AURenderEvent const* event = realtimeEventListHead; // I'm skipping the switch here since I'm just doing MIDI while (event != NULL) { if (event->head.eventType == AURenderEventMIDI) { AUMIDIEvent midiEvent = event->MIDI; uint8_t message = midiEvent.data[0] & 0xF0; uint8_t channel = midiEvent.data[0] & 0x0F; uint8_t data1 = midiEvent.data[1]; uint8_t data2 = midiEvent.data[2]; // do stuff event = event->head.next; } |
OK, do stuff. Like what? Well, change the data and send it back or add data.
I’ll do something obvious so you can hear it. I’ll add a note event that is pitched a major third above the note handed to me by the host. So you’ll hear a dyad.
Wait, I said “send it back”. How?
Remember that _outputEventBlock you cached? Put the bum to work now.
Hand it a time, a cable which is a virtual port (just use 0), and array of midi bytes and how many of those bytes you’re sending.
1 2 3 4 5 6 7 8 9 10 11 12 13 14 15 16 17 18 19 20 21 22 23 24 25 26 27 28 | AUEventSampleTime now = midiEvent.eventSampleTime - timestamp->mSampleTime; if( _outputEventBlock) { // AUEventSampleTime eventSampleTime, uint8_t cable, NSInteger length, const uint8_t *midiBytes); // send back the original unchanged _outputEventBlock(now, 0, event->MIDI.length, event->MIDI.data); // now make new MIDI data // note on uint8_t bytes[3]; bytes[0] = 0x90; bytes[1] = data1; bytes[2] = data2; if (message == 0x90 && data2 != 0) { bytes[1] = data1 + interval; _outputEventBlock(now, 0, 3, bytes); } // note off bytes[0] = 0x90; bytes[1] = data1; bytes[2] = 0; if (message == 0x90 && data2 == 0) { bytes[1] = data1 + interval; _outputEventBlock(now, 0, 3, bytes); } } |
That’s almost it. In the real example on Github, I capture _outputEventBlock and use that in the block – just as you would if you were doing audio (Apple’s demo captures the C++ DSP kernel class for example.) We’re not doing audio, but the render block is called at audio rate, so just apply the same rules as if it were audio. The rules? Don’t use self, don’t call Objective-C, don’t call Swift, no IO. Calling C++ is OK. (Actually, C++ is everywhere in iOS audio programming, so you might want to brush up on it.) Essentially, nothing that may block.
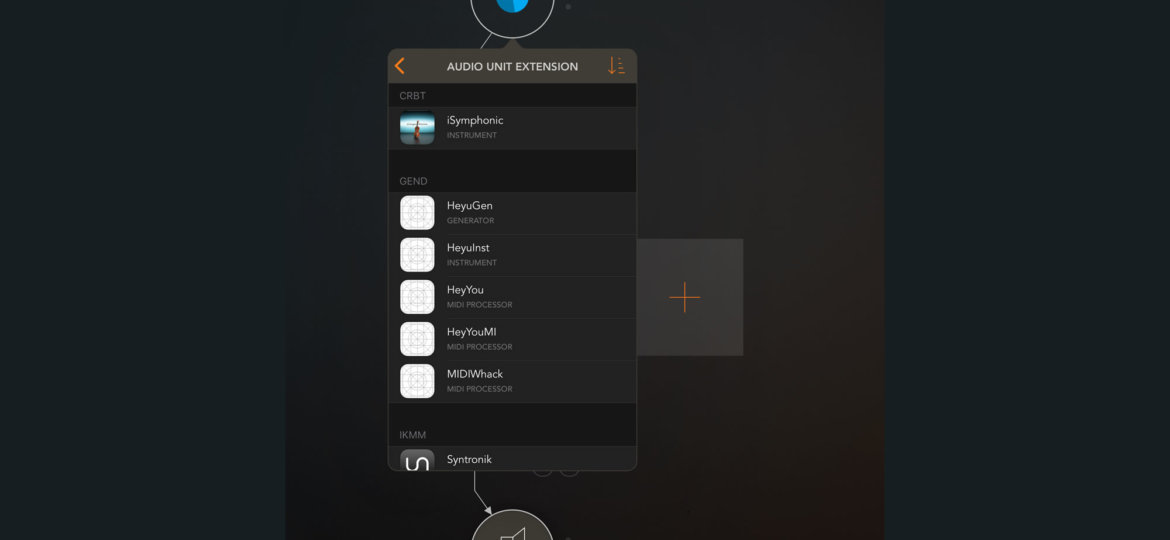
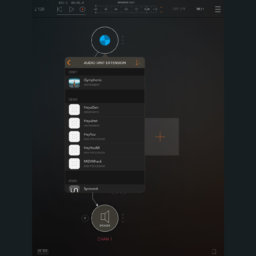
You can run the app on your device, but there’s nothing to see. It will register your extension(s). But you can just choose your plugin scheme and run on the device. This is a lot easier – you won’t have to attach to the extension process this way. You will be prompted for a host. Here is what it looks like in AUM:
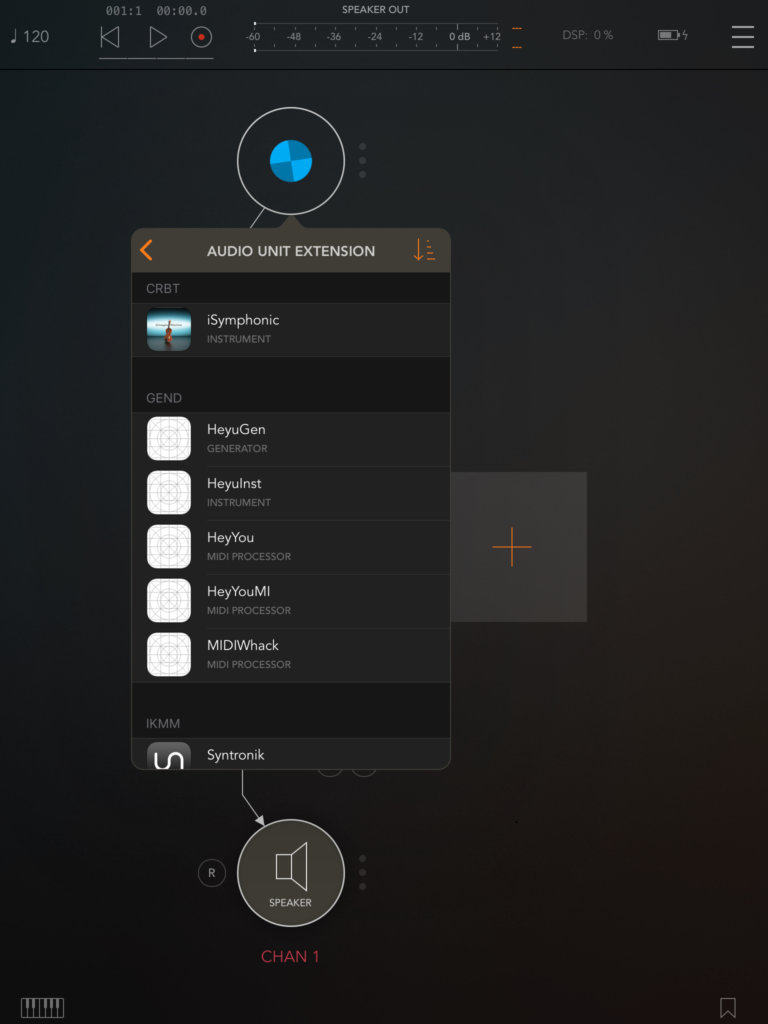
I have other plugins, but you can see HeyYou as a MIDI Processor.
After loading HeyYou, I loaded a synth. In this case Kauldron. Use what you have. I then set its source to HeyYou. Here you can see the MIDI name we set – “HeyYouMIDIOut”.
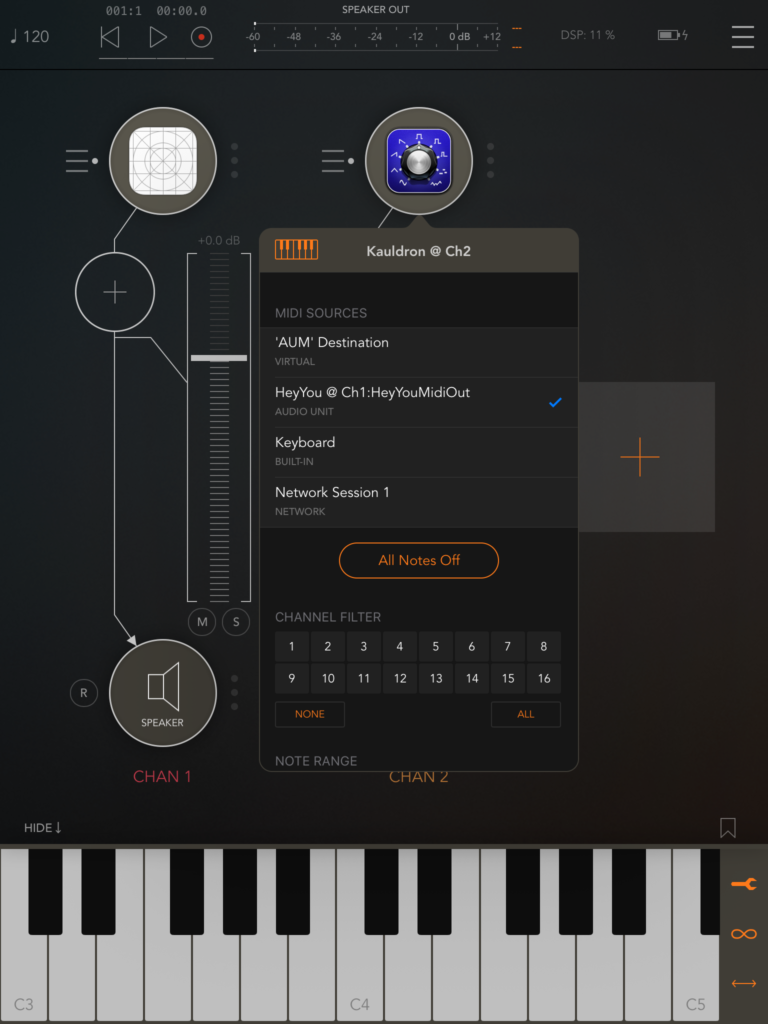
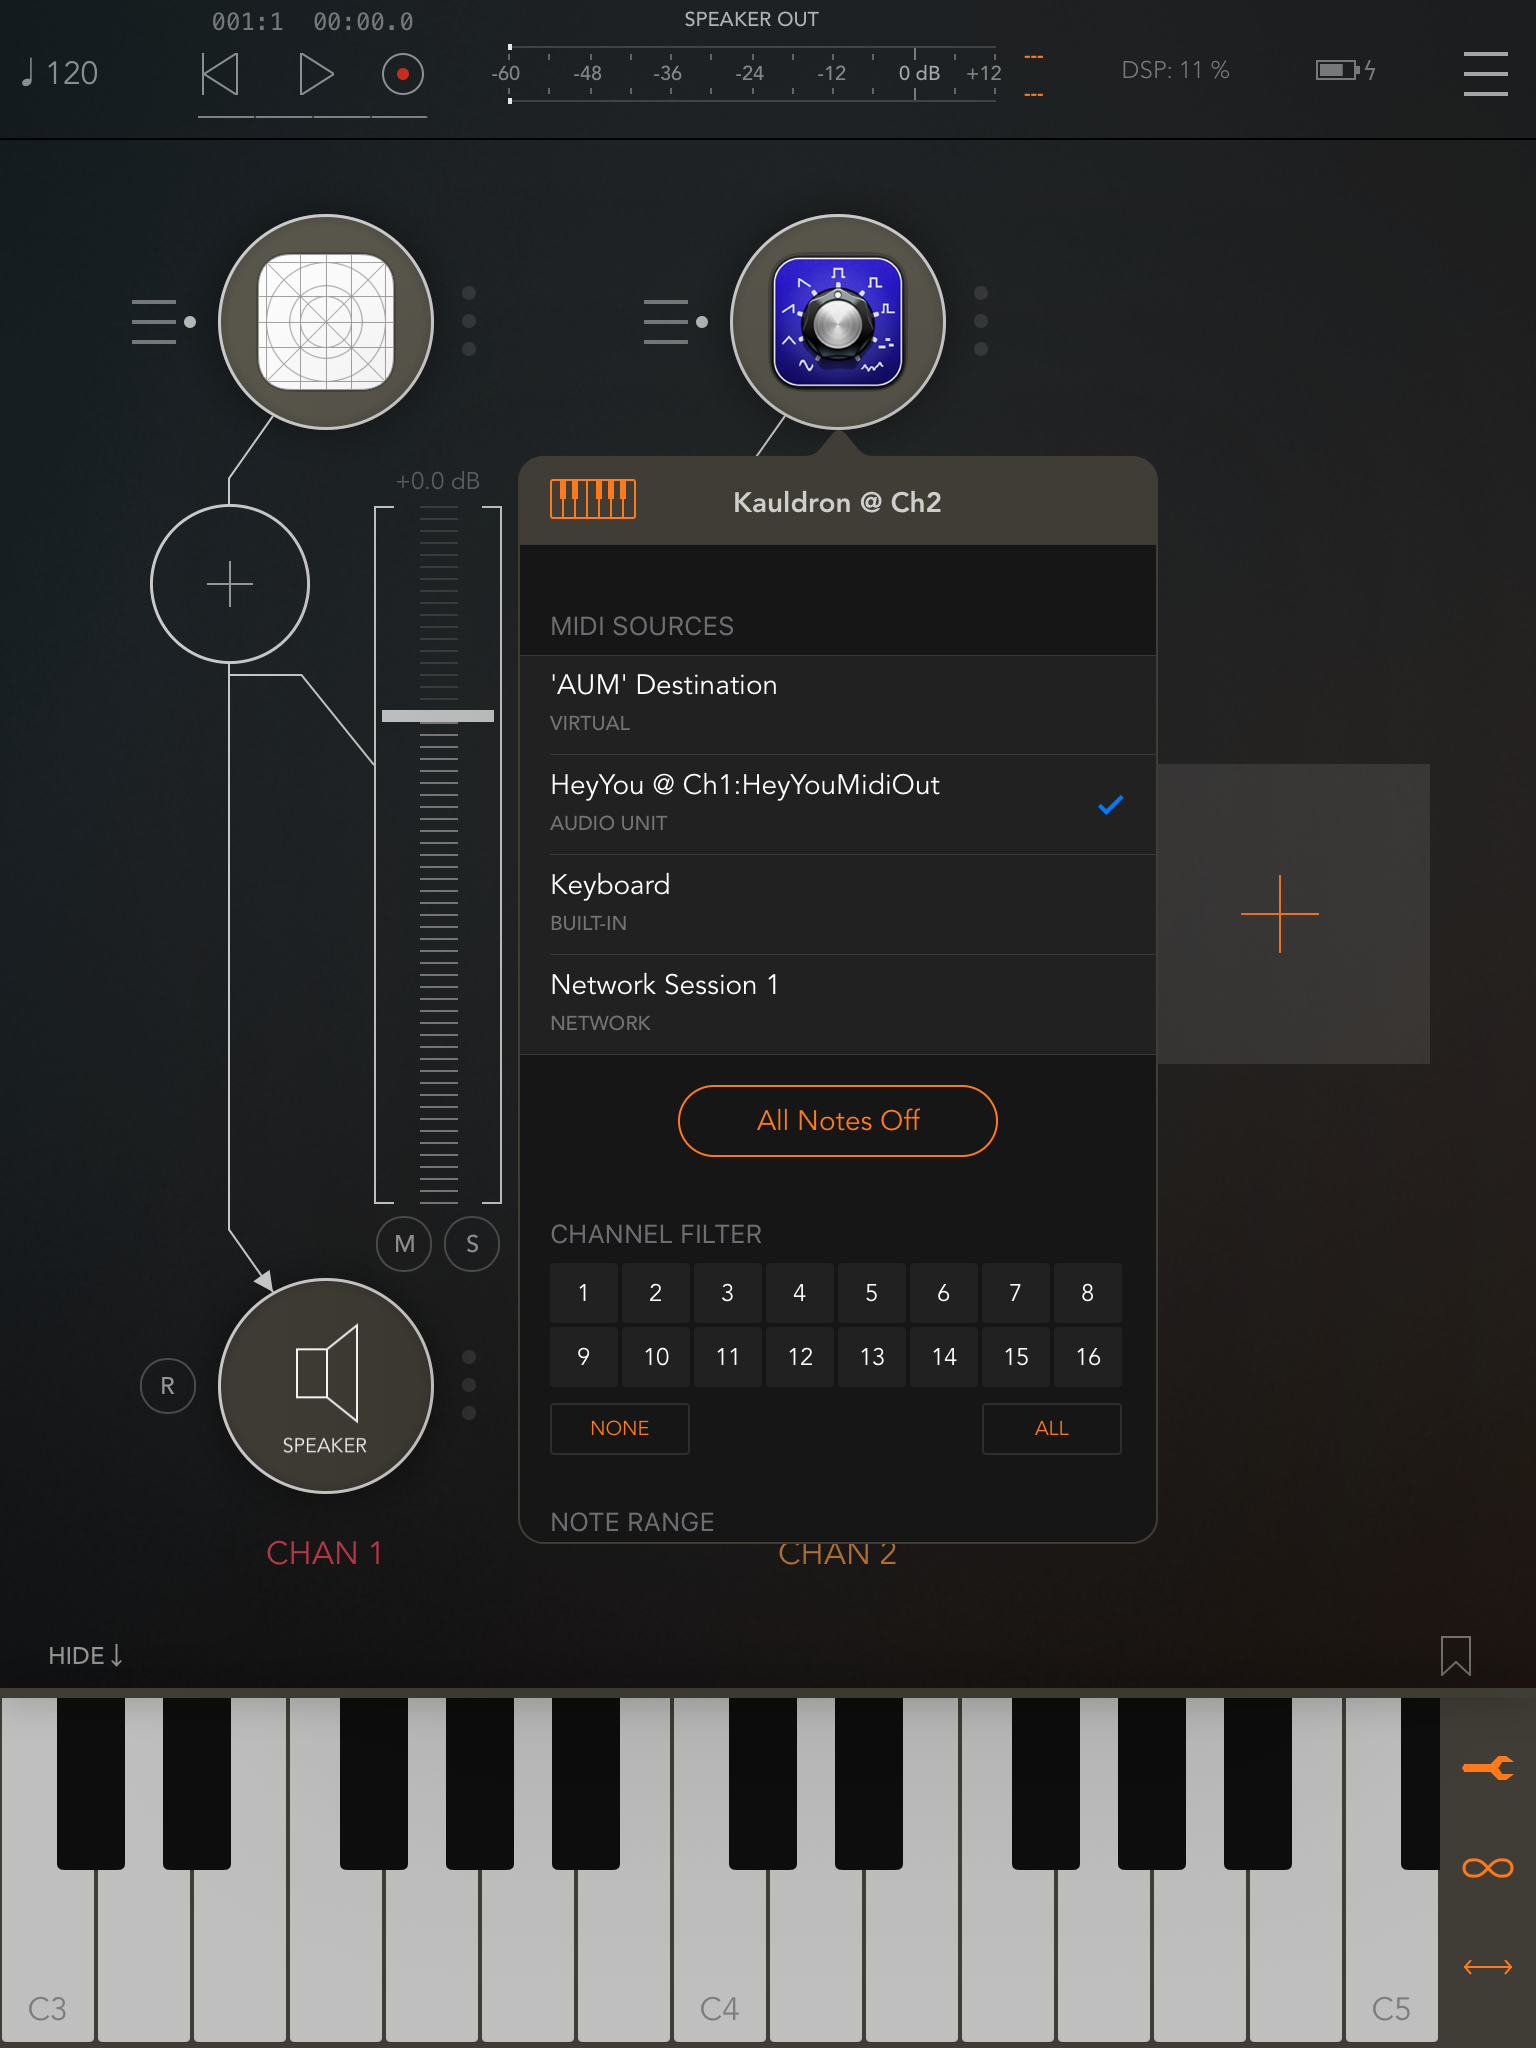
Then I showed the AUM keyboard, set its destination to HeyYou via the wrench icon, then I mashed the keys and heard glorious dyads.
What about those other blocks we cached? Well, for what we’re doing here, we don’t need them. But if we were playing a series of MIDI messages, we’d want to know the tempo and when the transport changed (e.g. the user pressed the play triangle button in AUM).
That’s left as an exercise for the reader 🙂
(it will actually be the blog post after the next – in which I’ll cover parameters.)
Summary
So now you’re receiving and sending MIDI data from an AU host. Aren’t you a bad ass now. Cool.
We did nothing with the UI. What if you wanted to allow the user to be able to set the interval? How do you set parameters? You probably saw the stubbed out parameter tree code. That’s how. I’ll do that in the next blog post.
Resources
- Github Project
- Bram Bos on AUv3 MIDI extensions.
- Chris Adamson’s AUv3 Brain Dump. This is for audio, not MIDI. Useful nevertheless.
- Apple – App extensions in General
- Apple – Audio Unit Extensions
- Apple’s Nascita di Venere

Is there any chance you could do an OS X example for Logic?
Clifton, the problem is that I don’t have the current version of Logic to test it. I could write it and hope it works, but then if it doesn’t…
Ok, I whacked together a macOS example. It validates via the command line command “auval”. But, I have no idea if it works in Logic. My version marks it as invalid. So, would you mind trying it out? Tell me what happens.
https://github.com/genedelisa/HeyYouMIDI
Great article – just what I have been looking for!
I built the OSX version from here https://github.com/genedelisa/HeyYouMIDI using XCode (v10.2.1).
Logic Pro X (v10.4.4) sees it fine: it is listed in the “Preferences | Plug-in Manager”, and validates when scanned:
“validating Audio Unit HeyYouAU by Gene De Lisa:
validation result: successfully validated
updating properties of AU HeyYouAU by Gene De Lisa…”
…but when adding it to an instrument track as a midi effect :
1) the midi effect plugin dropdown menu “Audio Units | Gene De Lisa | … ” context menu lists 8 instances of effect ‘HeyYouAU’
2) and picking any one of the 8 instances adds the effect to the instrument, but then overlays its entry in the effect list with an orange exclamation point – hovering over this with the mouse shows the tool tip “Missing Plug-in: HeyYouAU”
3) and although the midi effect otherwise shows ‘green’ and enabled, it has no audible effect and puts up no UI.
Did you – or anyone else – ever get this to work in Logic Pro?
Thanks a lot for this one-of-a-kind tutorial. I followed it quite precisely and found out that probably one important thing is missing. I was scratching my head hard when my app was not listed in any host after running build on the device. The missing part is that you need to add AudioToolbox framework in your AU extension settings. Maybe it’s obvious for more experienced iOS developers (which I am not), but there was no warning, only the AU was not listed by the hosts.
Hope this helps someone in the future.